
Categories
Money money money...
Could we help you? Please click the banners. We are young and desperately need the money



WordPress Multisite Guide


First of all, what is multisite and what is it used for?
Multisite is a WordPress feature, added in 3.0, that is used for creating a network of virtual sites stored in a single WordPress installation. By using multisite user can easily manage several sites and switch from one to another with just a few clicks of a button.
WordPress Multisite Pros
⦁ Updating: When It comes to updating WordPress or installed plugins, network admin updates it for all sites with a single update.
⦁ Adding new sites: Network administrator can easily add new site to the network (again with just a few clicks).
⦁ Sharing themes and plugins: Once you install a plugin or a theme you can share them with any site that is on your network.
⦁ Great choice for the individual or business company in need of several sites or blogs with similar interests.
⦁ Network admin is the only person that can add or delete plugins and at the same time the only person that can decide which theme and plugin is enabled to which site leaving little room for site admins to mess up the site.
⦁ Users can be assigned for one or more sites on the network
WordPress Multisite Cons.
⦁ Some plugins are made for regular wordpress installation and may not work on multisite.
⦁ If site admin wants to test a plugin he needs to ask network admin to install it first
⦁ Site admins can’t add plugins to the site they are managing and will need to ask from network admin to do that for them.
⦁ If theme source file is edited it effects all of the sites in the network that are using that theme (which can be good or bad, depending what you want to do).
Installing Multisite
Installation of wordpress multisite is pretty much the same like regular wordpress installation with only a few lines of code added to wp.config.php and change code in .htaccess
⦁ Install WordPress in the normal way
⦁ Open wp-config.php file and look for the line that says:
/* That's all, stop editing! Happy blogging. */
⦁ Above that line create a new line and type this
define( 'WP_ALLOW_MULTISITE', true );
(save your wp-config.php file)
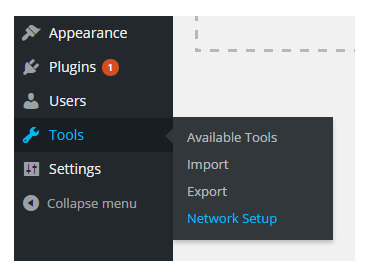
⦁ Once multisite is defined in wp-config.php a new option named “Network Setup” will be available in tools menu.
⦁ When you enter Network setup screen you will get to enter Network Title and Network Admin Email
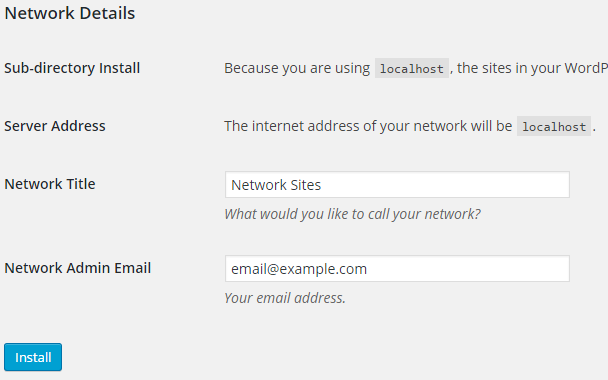
Once you click the install button you will get to next part of multisite installation.
If you activate multisite on a fresh WordPress installation, you will see an option to choose either subdomains or sub directories. (in my example it is sub directory install)

⦁ After choosing Sub-domains/Sub-directories continue to next step
Here you will see lines of code that WordPress generated for you. You will need to add them to your wp-config.php and .htaccess
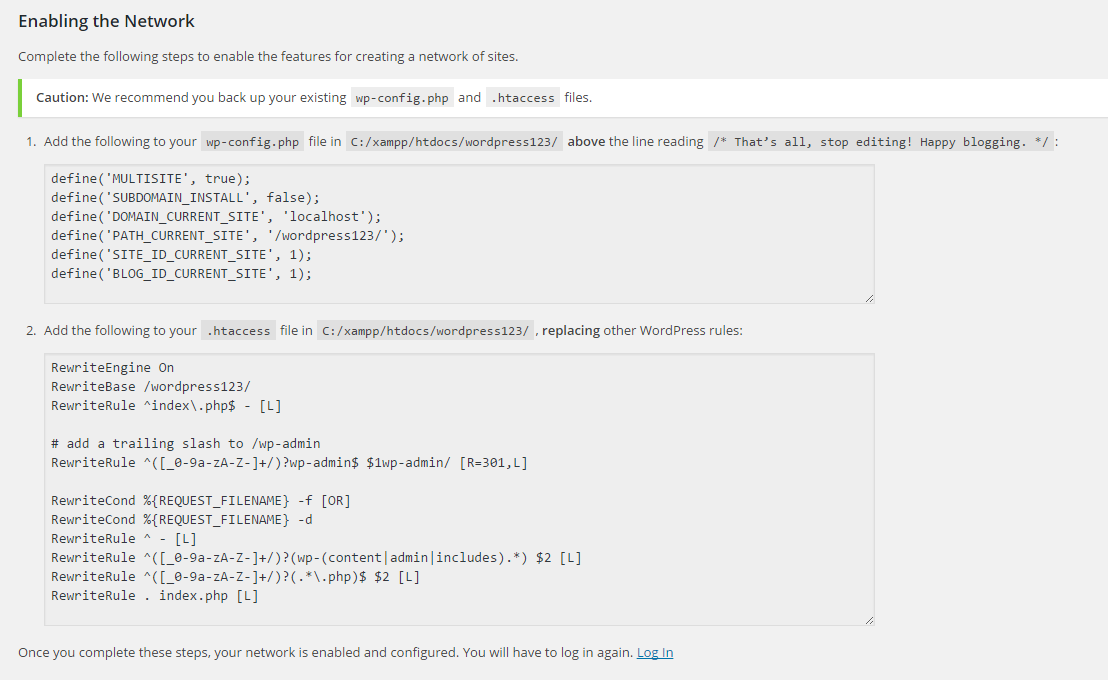
⦁ Copy the code from the first field and add it in your wp-config.php file above the line that says /* That’s all, stop editing! Happy blogging. */
⦁ Copy the code from the second field and add it to your .htaccess file. Make sure to replace any existing WordPress rules In your .htaccess file (place the code between # BEGIN WordPress and # END WordPress tags.
⦁ After doing these steps you will need to relog (if you look at the picture above there is “Log in” shortcut) and your network installation is complete.
If you followed these instructions there should not be any problems and your network installation is complete.
Managing Your Network
Now your network is in place and running just one site, which is the main site for the network. This site is no different from the other sites which will be added to your network: it has the same admin screens and the same permissions.
Managing your network will consist of:
⦁ Creating and managing sites
⦁ Installing and activating themes
⦁ Installing and deactivating plugins
⦁ Installing updates
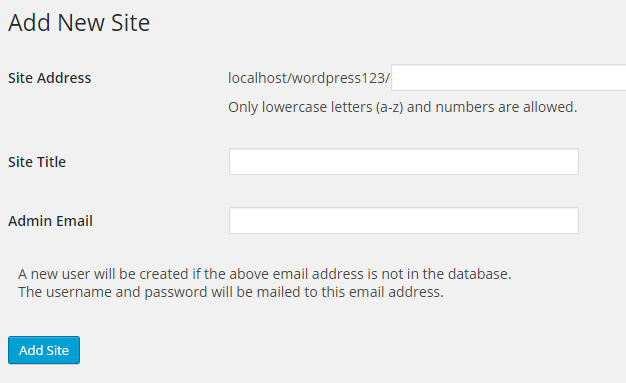
Creating a new site is pretty simple and you do it from the network admin screen. All you need to do is go to My Sites > Network Admin > Sites
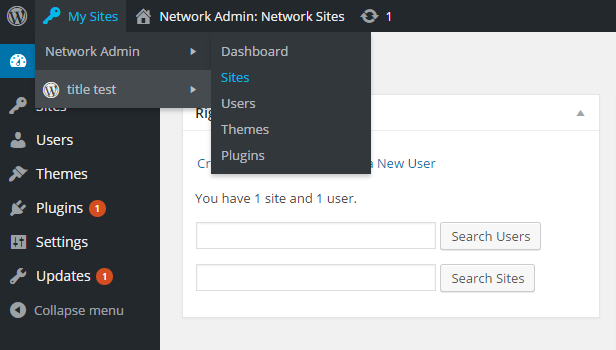
There you will see the list of all sites on your network and Add New button.
Click the Add New button and type in the site address , site title and the email address of the site administrator and click Add Site
Installing and Activating Themes
As I mentioned before, only the super admin of a wordpress network can install themes and make them available for sites in the network to use. That means that once you install the theme you will need to go to My Sites > Network Admin, click on Themes, find the theme that you installed and click on Network Enable. After that hover on My Sites and select the site where you want to change the theme and change it as you would in a regular wordpress installation (Appearance > Themes).
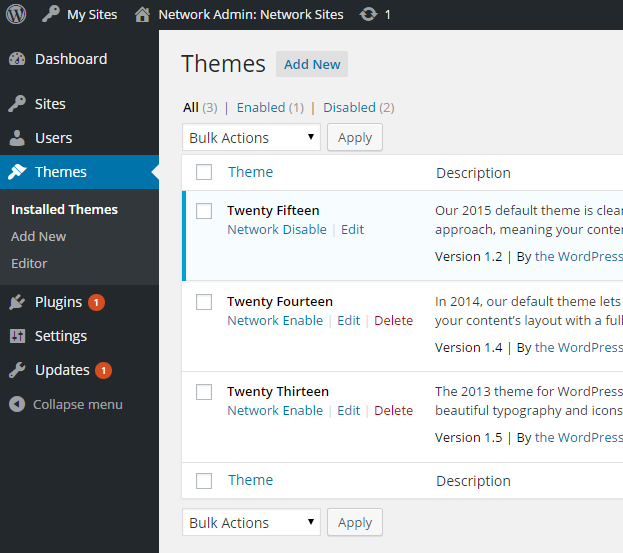
Network Enable means that your theme is enabled for all the sites in your network. If you want to enable it only for a specific site (or a couple of them), leave it on “disabled” and follow the method bellow.
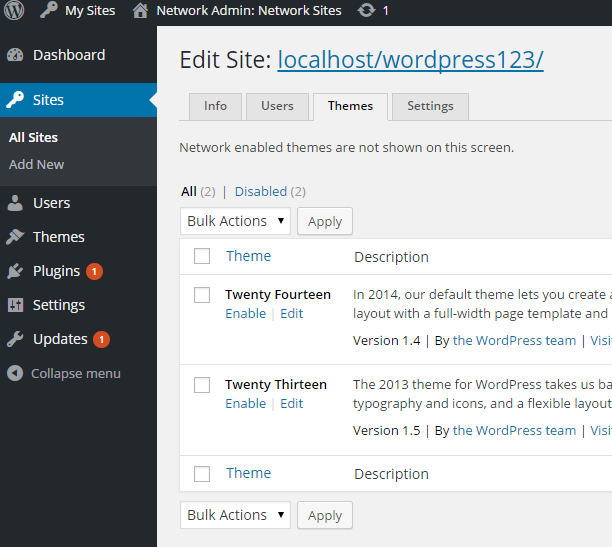
Go to My Sites > Network Admin > Sites, once there, hover on the site where you want to change the theme and click Edit. Click on Themes and enable the theme that you want to use on that site.
When it comes to plugins the installation process is pretty much the same…
Users
When it comes to adding and managing users it works in the same way as in standard WordPress installation.
One of a few differences is that the Users screen tells you which sites a user can access. One user can be assigned to multiple sites in network.
Overview
While experimenting with Multisite I’ve came to the conclusion that it is indeed a powerful addition to the regular wordpress. I mean, it let’s you create more than one site on the same wordpress installation and helps you manage them all.
I hope that you found this WordPress Multisite Guide helpful and I just want to mention that I am still “young” when it comes to programming or blogging (especially blogging) and forgive me if I could not explain everything the way professionals do it. If there is something I missed, please, let me know in comments bellow.
