Categories
Money money money...
Could we help you? Please click the banners. We are young and desperately need the money
Last updated: October 1st 2025
Categories: Cyber Security, IT Development
Author: Ian Walser
How to Secure Your WordPress Website with Basic HTTP Authentication
Short introduction
Securing your WordPress website is a fundamental step in protecting sensitive data and controlling access to specific areas of your site. One simple yet effective method is using basic HTTP authentication. This guide is tailored for junior developers looking to implement this feature for the first time. Let’s dive into the setup process, step-by-step!
What is Basic HTTP Authentication?
Basic HTTP Authentication is a security mechanism that restricts access to specific pages or directories on your website. Visitors are prompted to enter a username and password before gaining access. This layer of security is especially useful for:
- Protecting staging or development environments.
- Restricting access to sensitive pages or admin tools.
- Adding an additional layer of security to login forms.
Setting Up Basic HTTP Authentication on WordPress
Follow these steps to configure HTTP authentication on your WordPress website:
Step 1: Update Your .htaccess File
Locate or create a .htaccess file in the directory you wish to protect. Add the following lines of code:
RewriteEngine On

AuthType Basic
AuthName "restricted area"
AuthUserFile /path/to/your/.htpasswd
Require valid-user
Here’s a breakdown of what each line does:
- RewriteEngine On: Enables URL rewriting, a prerequisite for many .htaccess configurations.
- AuthType Basic: Specifies basic HTTP authentication.
- AuthName "restricted area": Displays the authentication prompt with a custom message.
- AuthUserFile: Points to the location of your .htpasswd file, which stores encrypted credentials.
- Require valid-user: Ensures that only authenticated users can access the protected area.
Step 2: Create a .htpasswd File
The .htpasswd file contains the usernames and passwords required for authentication. These passwords are encrypted for added security. Use the following command to generate a password:
htpasswd -c /path/to/your/.htpasswd username
This command creates the .htpasswd file and adds an encrypted password for the specified username. If the file already exists, omit the "-c" flag to avoid overwriting it:
htpasswd /path/to/your/.htpasswd anotheruser
Setting a Custom Password in the .htpasswd File
If you prefer not to use the htpasswd command, you can manually create an entry for your username and a custom password. To do this, you’ll need to generate an encrypted version of your password. You can use an online generator, such as an htpasswd generator tool, or a command-line utility like OpenSSL.
For example, using OpenSSL to generate a hashed password:
openssl passwd -apr1 "YourCustomPassword"
This command will output a hashed password. Combine it with your username in the following format and save it to the .htpasswd file:
username:$apr1$JZ3Na7b8$3yNlPLX2jRCak85aNkjfF/
Here’s what each part means:
- username: The username required for authentication.
- $apr1$: Indicates the use of the MD5-based cryptographic hashing algorithm.
- JZ3Na7b8...: The hashed and salted password.
Save the username and hashed password in the .htpasswd file, ensuring each user’s credentials are on a new line. For example:
user1:$apr1$Sd3f...$6C5fC8D4yW5
user2:$apr1$Ae9t...$3g7GnRz5J6b
Remember to test the credentials by attempting to access the protected area. This ensures the manually added entries are functioning correctly.
Step 3: Why use Password Encryption?
The passwords in the .htpasswd file are encrypted using the MD5 or bcrypt algorithms, depending on your server’s configuration. These encryption methods ensure that even if someone gains access to the .htpasswd file, they won’t be able to easily decipher the stored passwords.
Here’s an example of how a password might look in the .htpasswd file:
username:$apr1$sd9f...$x5kG8C3Bcl5
Avoid manually editing this file unless you know what you are doing.
Testing Your Setup
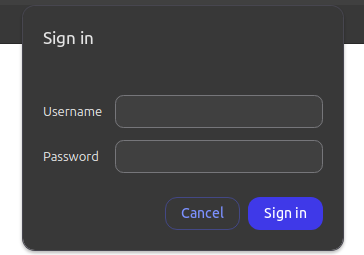
Once you’ve completed the setup, visit the page or directory you protected. You should see a prompt asking for your username and password. Enter the credentials you set up in the .htpasswd file to access the page.

Troubleshooting Common Issues
If you encounter any problems, consider these tips:
- Double-check the path to the .htpasswd file in the .htaccess configuration.
- Ensure your server supports .htaccess configurations. Some hosting providers disable this feature by default.
- Review file permissions. Both .htaccess and .htpasswd files should have restricted permissions to prevent unauthorized access.
Best Practices for HTTP Authentication
To maximize the security of your implementation:
- Use strong, unique passwords for each user.
- Regularly update passwords to mitigate potential breaches.
- Combine HTTP authentication with HTTPS to encrypt data in transit.
- Don't only depend on HTTP Auth and use something in addition to prevent successfull security breaches.
Conclusion
Adding basic HTTP authentication to your WordPress website is a straightforward process that significantly improves security. By following the steps outlined above, you can protect sensitive areas of your site with minimal effort. As a junior developer, mastering these techniques will help you build a strong foundation in web security.
Do you have questions or need assistance? Feel free to leave a comment below!
